Thursday, August 11, 2011

Balsamic BBQ Sauce

This is yet another winning recipe from Giada De Laurentis.

I LOVE balsamic vinegar and turning into a sticky, tangy, sweet barbecue sauce is genius! I have only used this on chicken but she also recommends using it for New York strip steak.

1 cup balsamic vinegar
3/4 cup ketchup
1/3 cup brown sugar
1 garlic clove, minced
1 tablespoon Worcestershire sauce
1 tablespoon Dijon mustard
1/2 teaspoon salt
1/2 teaspoon freshly ground black pepper

To make the sauce:
Combine all ingredients in a small saucepan and stir until all the ingredients are incorporated and the mixture is smooth. Simmer over medium heat until reduced by 1/3, about 15-20 minutes.

For the chicken (or steak):
Place a grill pan over medium heat or preheat your BBQ. Season the meat with salt and pepper. Lightly coat with some of the BBQ sauce using a pastry brush. Place the meat on the grill. Place the remaining BBQ sauce, still in small saucepan, over low heat or on the edge of a BBQ grill and allow to gently simmer while the meat cooks.
Cook the chicken about 8 minutes per side. Cook the steaks starting at about 4 minutes per side until a meat thermometer read the desired temperature (120 for medium rare, 135 for medium-about 6 minutes per side, 155 for well done-about 9 minutes per side). Continually brush the meat with BBQ sauce every few minutes. Remove the meat from the grill and let rest for at least 5 minutes. Serve with the heated BBQ sauce alongside.
Alternately, the chicken can be baked in the oven. Preheat the oven to 375. Place the chicken skin side up in a baking dish and bake for 25 minutes. Remove the baking dish from the oven and bake for another 15 minutes.
Posted by Picasa

Peach Crumble Pie

This pie is so satisfying and delicious. It has three steps to making it but each one is easy and can be made at different points during the day. Then put it all together and bake when you get a chance.
I used white peaches because that is what looked good at the Farmers Market, I have made it twice with the white peaches and it's fantastic.
You must serve with vanilla ice cream. Don't even consider not doing it.
  • For The Crust:

    • 1 1/4 cups flour (spooned and leveled), plus more for rolling
    • 1/4 teaspoon fine salt
    • 2 teaspoons sugar
    • 1/2 cup (1 stick) cold unsalted butter, cut into small pieces
  • For The Filling:

    • 3 pounds peaches, halved, pitted, and cut into 1/2-inch slices (8 cups or about 8 peaches)
    • 2 tablespoons brown sugar
    • 2 tablespoons flour
  • For The Crumble:

    • 1/3 cup packed brown sugar
    • 1/3 cup flour (spooned and leveled)
    • 1/3 cup old-fashioned rolled oats
    • 6 tablespoons (3/4 stick) cold unsalted butter, cut into small pieces

    1. Make crust: In a food processor, pulse flour, salt, and granulated sugar until combined. Add butter; pulse until mixture resembles coarse meal, with a few pea-size pieces of butter remaining (I just use a whisk and then mix in the butter with my fingers--it's faster and uses less equipment). Sprinkle with 3 tablespoons ice water. Pulse (or gently knead) until dough is crumbly but holds together when squeezed (if necessary, add up to 2 tablespoons ice water, 1 tablespoon at a time); do not overmix. Form dough into a disk, wrap tightly in plastic, and refrigerate until firm, at least 1 hour (or up to overnight)--in a hurry I stick it in my freezer for about 20 minutes. And I am always in a hurry!
    2. Preheat oven to 375 degrees. Lightly flour a rolling pin and work surface and roll out dough to a 12-inch round. Place in a 9-inch pie plate, fold overhang under, and crimp edges.
    3. Make filling: In a large bowl, toss together peaches, brown sugar, and flour until combined.
    4. Make crumble: In a small bowl, combine brown sugar, flour, and oats; using your hands, work in butter until large clumps form.
    5. Transfer peach filling to pie shell, then sprinkle crumble evenly over top. Place pie on a rimmed baking sheet and bake until juices are bubbling and topping is golden, 1 hour to 1 hour 15 minutes. Let cool on a wire rack 1 1/2 hours before serving.
  • Recipe courtesy of Martha Stewart, Everyday Food magazine.
  • Posted by Picasa
  • Grilled Romaine

    I am constantly on the look out to find new ways to incorporate more veggies into our diet and for them to taste good and be interesting. Here is one of the latest.

    Heads of romaine thrown on the grill. Brilliantly simple.

    Wash and dry lettuce (leaving heads whole)

    Drizzle with olive oil and sprinkle with a little salt, and pepper.

    Throw on the barbie rotating every few minutes until you get nice grill marks and the leaves just begin to wilt. Sprinkle with additional salt and pepper before serving.

    The result: lettuce that actually tastes good!
    Posted by Picasa

    Tuesday, May 3, 2011

    Maple Mousse, April DB Challenge

    The April 2011 Daring Bakers' challenge was hosted by Evelyne of the blog Cheap Ethnic Eatz. Evelyne chose to challenge everyone to make a maple mousse in an edible container.
    Maple Mousse:

    1 cup pure maple syrup
    4 large egg yolks
    1 package (1 tablespoon) unflavored gelatin
    1 1/2 cups whipping cream

    Directions:

    1. Bring maple syrup to a boil then remove from heat.
    2. In a large bowl, whisk egg yolks and pour a little bit of the maple syrup in while whisking (this is to temper your egg yolks so they don’t curdle).
    3. Add warmed egg yolks to hot maple syrup until well mixed.
    4. Measure 1/4 cup of whipping cream in a bowl and sprinkle it with the gelatine. Let it rest for 5 minutes. Place the bowl in a microwave for 45 seconds (microwave for 10 seconds at a time and check it in between) or place the bowl in a pan of barely simmering water, stir to ensure the gelatine has completely dissolved.
    5. Whisk the gelatine/whipping cream mixture into the maple syrup mixture and set aside.
    6. Whisk occasionally for approximately an hour or until the mixture has the consistency of an unbeaten raw egg white.
    7. Whip the remaining cream. Stir 1/4 of the whipped cream into the maple syrup mixture. Fold in the remaining cream and refrigerate for at least an hour.
    8. Remove from the fridge and divide equally among your edible containers.

    For my "edible container" I chose to make my favorite pie crust, pat-in-the-pan pie crust.

    I sprinkled the mini desserts with chopped pecans and then I drizzled some of them with chocolate syrup.

    These little beauties turned out absolutely wonderful. The maple mousse was delicious and could be used for a multitude of desserts. Yum!

    Sunday, April 24, 2011

    Simple Sesame Noodles

    These noodles are so quick and easy. They almost make me want to learn to use chopsticks.

    Almost.

    Ryan can't get enough of these. If left unattended I believe he would eat the entire bowl.

    True story.

    12 ounces, fluid thin noodles, cooked and drained (I used Japanese Soba noodles)
    ¼ cups Soy Sauce
    2 Tablespoons Sugar
    4 cloves Garlic, Minced
    2 Tablespoons Rice Vinegar
    3 Tablespoons Pure Sesame Oil
    ½ teaspoons Hot Chili Oil
    4 Tablespoons Canola Oil
    2 Tablespoons Hot Water
    4 whole Green Onions, Sliced Thin

    Whisk all ingredients (except noodles and green onions) together in a bowl. Taste and adjust ingredients as needed.
    Pour sauce over warm noodles and toss to coat.
    Sprinkle with green onions and toss.

    Recipe from Pioneer Woman.

    Sunday, April 10, 2011

    White Chocolate Coconut Brownies

    Rich. Decadent. Addicting. Yes, yes, yes.

    These little beauties are quite a treat. If you are looking for a change from regular old brownies (not that there's anything wrong with those) then give these a whirl.

    I consider these a fancy dessert (pinkies in the air!). Meaning you could take them somewhere where you want to impress people with your fancy baking skills.

    1 1/3 cups flour
    1 teaspoon salt
    11 ounces white chocolate, coarsely chopped (I used Ghirardelli white chocolate chips)
    1 1/2 sticks (12 tablespoons) unsalted butter, cut into 1-inch pieces
    1½ cups sugar
    ½ cup packed brown sugar
    5 eggs, at room temperature
    2 teaspoons vanilla
    1 cup shredded coconut

    Preheat the oven to 350 degrees F. Butter the sides and bottom of a 9×13 pan. Line the pan with parchment paper.

    In a medium bowl, whisk the flour and salt together.

    Put the white chocolate and butter in a large bowl and set it over a saucepan of simmering water, stirring occasionally, until the chocolate and butter are completely melted and smooth. Turn off the heat, but keep the bowl over the water and add the sugars. Whisk until completely combined, then remove the bowl from the pan. The mixture should be room temperature.

    Add 3 eggs to the white chocolate mixture and whisk until combined. Add the remaining eggs and whisk until combined. Add the vanilla and stir until combined. Do not overbeat the batter at this stage or your brownies will be cakey.

    Sprinkle the flour mixture and the coconut over the chocolate mixture. Using a rubber spatula (not a whisk), fold the flour and coconut mixture into the chocolate until just a bit of the flour mixture is visible.

    Pour the batter into the prepared pan and smooth the top. Bake in the center of the oven for 35-40 minutes, rotating the pan halfway through the baking time, until a toothpick inserted into the center of the brownies comes out with a few moist crumbs sticking to it and the top is dark golden brown. Let the brownies cool completely, then lift them out of the pan using the parchment paper. Cut into squares and serve.

    Recipe adapted from Brown Eyed Baker

    Monday, April 4, 2011

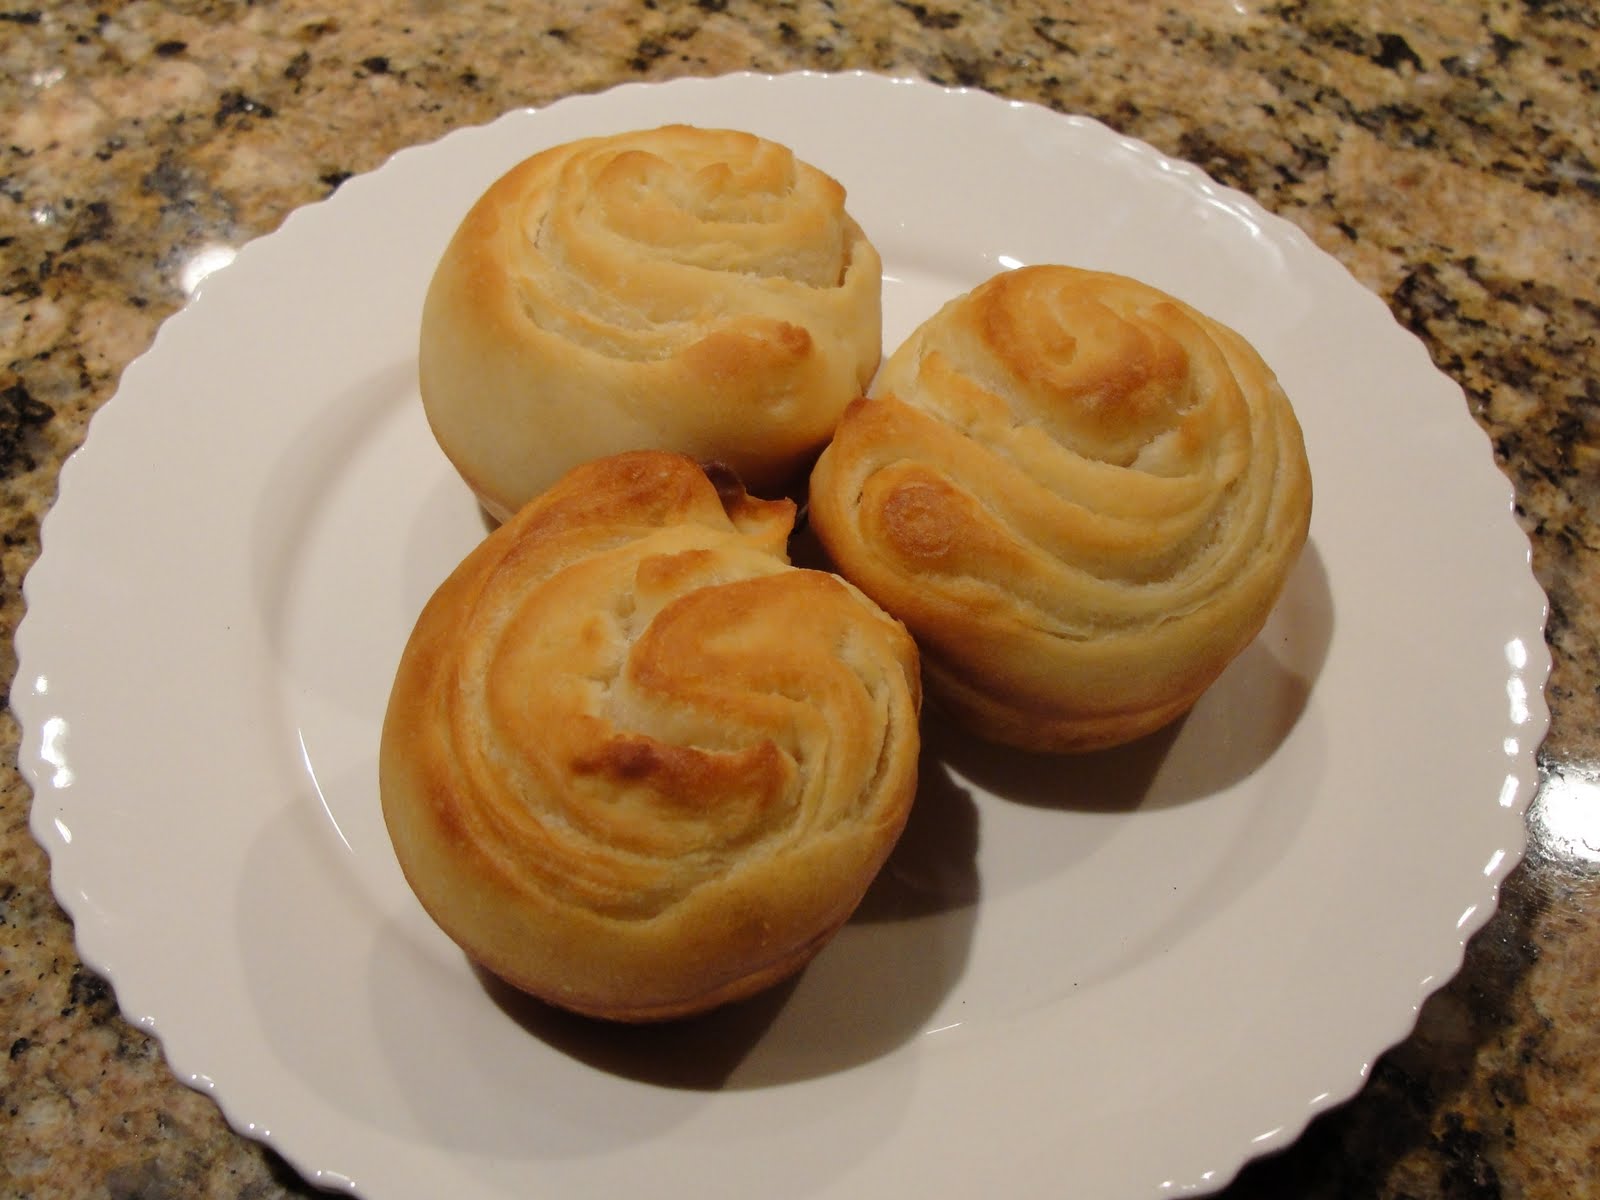
    Flaky Dinner Rolls


    These rolls were so amazing. The recipe only makes 12 rolls, definitely not enough! It would be wise to double it.
    These rolls seem special. Like the type of rolls that only come out on holidays. That's really not fair.
    I hereby grant permission for these rolls to be served anytime of year, regardless of the festivity level. Serve them on Arbor Day. Serve them for Daylight Savings Time. Serve them on Tuesday.
    Just do it.


    3 tablespoons sugar
    1 package dry yeast (2 1/4 teaspoons)
    1 cup warm fat-free milk (100° to 110°)
    3 cups flour, divided
    3/4 teaspoon salt
    3 tablespoons butter, softened
    Cooking spray

    Dissolve sugar and yeast in warm milk in a large bowl; let stand 5 minutes. Lightly spoon flour into dry measuring cups; level with a knife. Add 2 3/4 cups flour and salt to yeast mixture; stir until a dough forms. Turn dough out onto a lightly floured surface (or use the dough hook in your Kitchen-Aid). Knead until smooth (about 5 minutes); add enough of remaining flour, 1 tablespoon at a time, to prevent dough from sticking to hands, or the sides of the bowl (dough will feel slightly sticky). Cover dough with plastic wrap, and let rest for 10 minutes.

    Roll dough into a 12 x 10-inch rectangle on a lightly floured baking sheet. Gently spread butter over dough. Working with a long side, fold up bottom third of dough. Fold top third of dough over the first fold to form a 12 x 3-inch rectangle. Cover with plastic wrap; place in freezer for 10 minutes.

    Remove dough from freezer; remove plastic wrap. Roll dough, still on baking sheet (sprinkle on a little more flour, if needed), into a 12 x 10-inch rectangle. Working with a long side, fold up bottom third of dough. Fold top third of dough over the first fold to form a 12 x 3-inch rectangle. Cover with plastic wrap; place in freezer for 10 minutes.

    Remove dough from freezer; remove plastic wrap. Roll dough, still on baking sheet, into a 12 x 8-inch rectangle. Beginning with a long side, roll up dough jelly-roll fashion; pinch seam to seal (do not seal ends of roll). Cut roll into 12 equal slices. Place slices, cut sides up, in muffin cups coated with cooking spray. Lightly coat tops of dough slices with cooking spray. Cover and let rise in a warm place (85°), free from drafts, 45 minutes or until doubled in size.

    Preheat oven to 375°.

    Bake dough at 375° for 20 minutes or until golden brown. Remove from pan, and cool for 5 minutes on a wire rack. Serve rolls warm.

    Recipe from Cooking Light